Wireless Ethernet Bridge Project
Recently, at work we needed to setup a remote data backup to back up our important data to a remote location. Should our building burn to the ground we still have a copy of our data. We looked into getting a point to point connection from the local telco companies and other ISP's and wondered if we could do it cheaper ourselves. With my interest in radio technology and Linux, I went home and spent a fair amount of my own time to learn what we could do.
I quickly learned, bandwidth costs, ALOT! I found off the shelf out of the boxes for $1000 or more, some of them required FCC licenses and a learning curve. I also found some wireless ethernet bridge devices for under $100 but the reviews of these devices were not very impressive.
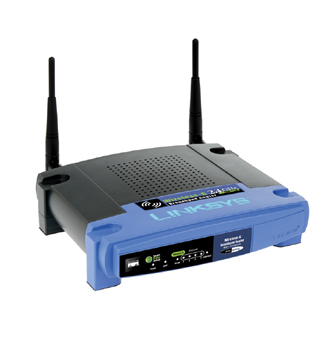
So, I did some digging and found people hacking the Linksys WRT54GL wireless
routers into bridges, repeaters, and several other modes. I thought, hey they
are cheap, no licensing required, and just a bit of a learning curve to learn.
I reloaded the firmware my routers and used Talisman firmware availible here.
Getting the bridge to work is a bit tricky, but its doable (About 10 hours
worth of playing).
I used these two wireless routers and added two outdoor 19
db flat panel antennas with LMR400 cable and connectors ($240 worth!)
from Radio Labs.
|
 |
Flat panel Antenna |
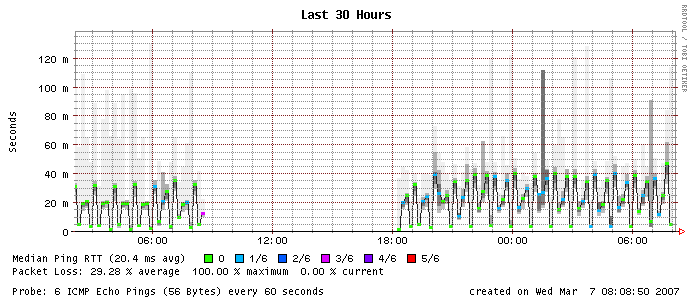
Then I setup two Linux servers with apache, smokeping, and ifgraph to watch the connection on the bridge.
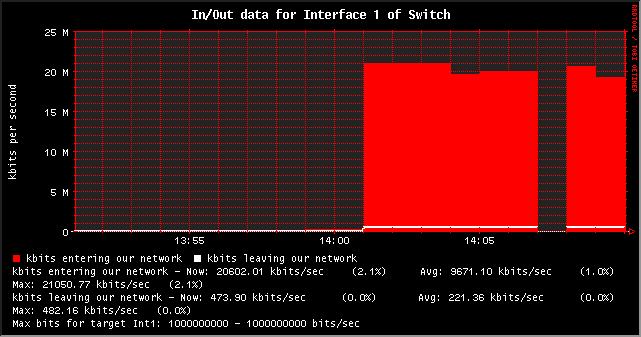
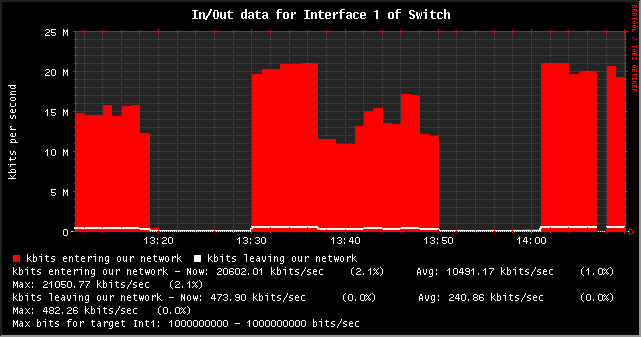
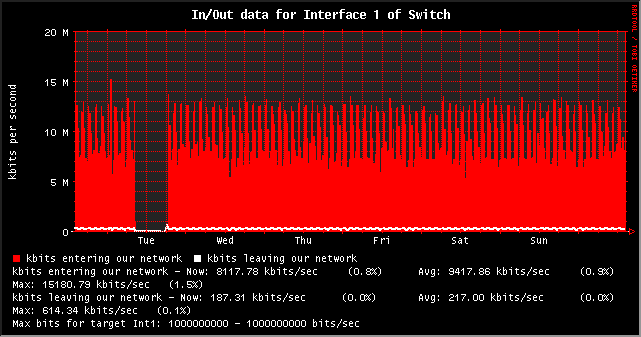
I am happy to report, I was able to pump about 23 mb/s, or 2.8 mB/s of traffic over the bridge. Thats about all I can get over the bridge. Before I hooked up the Linux servers to the bridge, I tested them on 100 mb/s copper and got about 80 mb/s of bandwidth. So I am confident the bridge is the bottleneck and can only handle about 23 mb/s of bandwidth.
Here are some photos of my setup in my backyard for testing
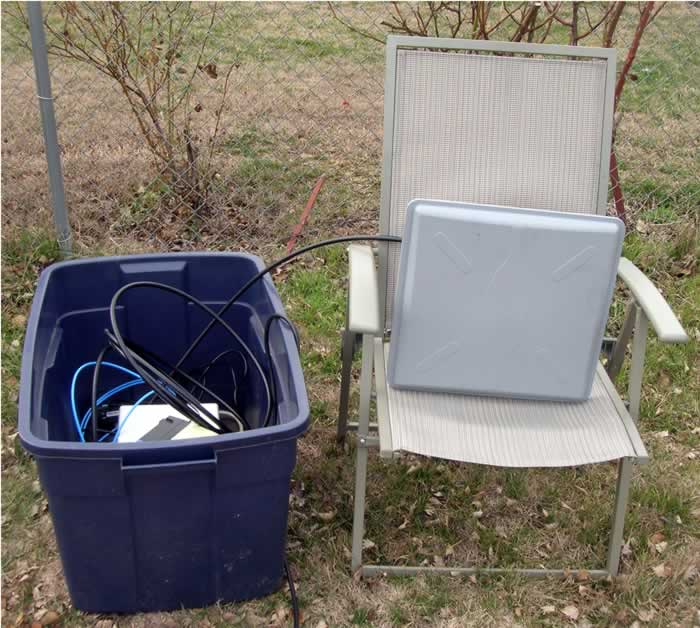 Ethernet Bridge setup #1 |
 Ethernet Bridge setup #2 |
 Looking accross to the ethernet bridge (30 feet, Wow!) |
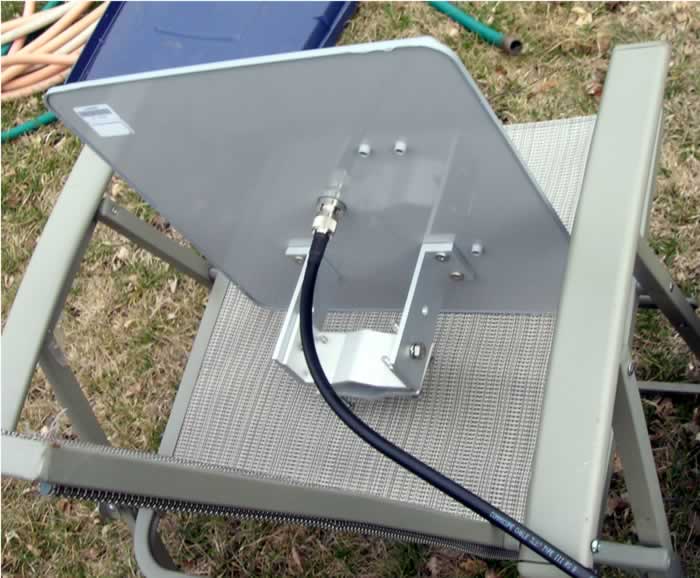 One of my 19 db flat panel antennas |
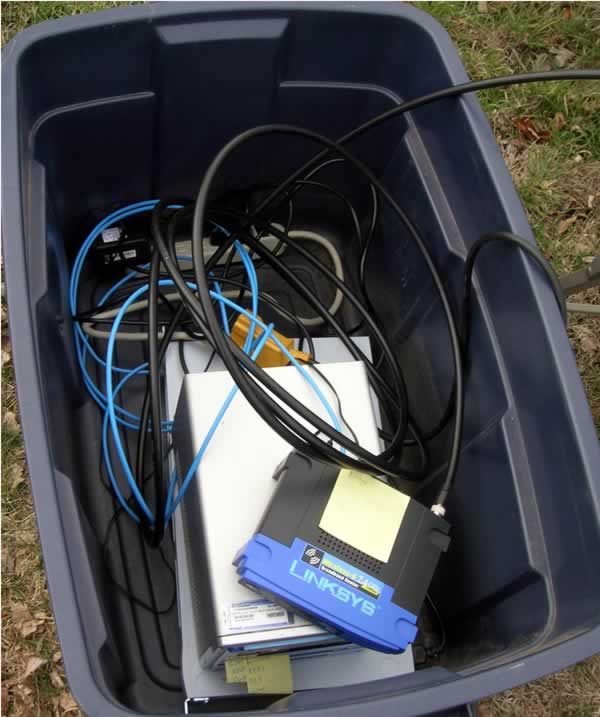 One end of the ethernet bridge, consisting of hacked wireless access point, snmp enabled switch, and a Linux box |
Cost Tally:
| 2 x Linksys WRT54G | $140 |
| 2 x 19 db Flat Panel Antennas | $150 |
| 2 x 20 ft. LMR 400 cable | $84 |
| Total | $374 |
Everything else I either had laying around the house or was able to borrow
from work for this experiment. I hope to put this on two buildings and go
a longer distance to see how well this bridge performs. If nothing else, I
have proved this can be done!
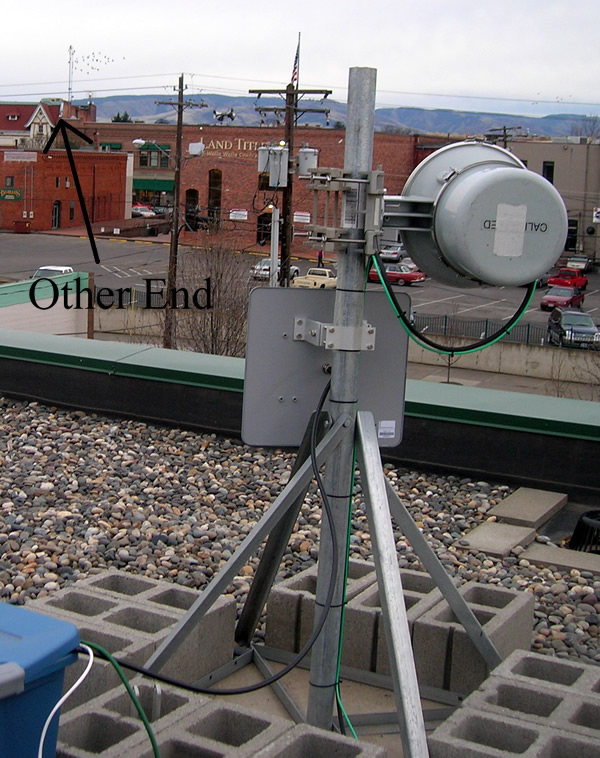
RESULTS!
I ran the WRT54GL's on two roofs with the antennas, two linux servers, and snmp enabled switches so I could monitor the bandwidth closely. Here is a picture of the setup
 |
 |
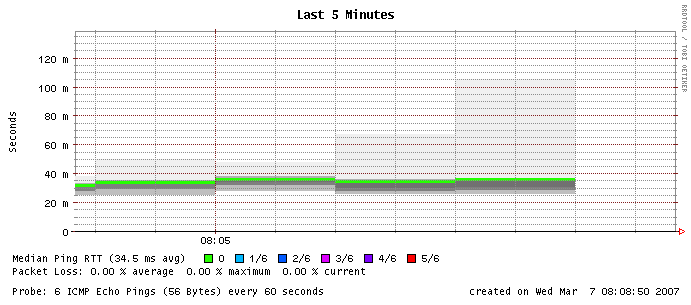
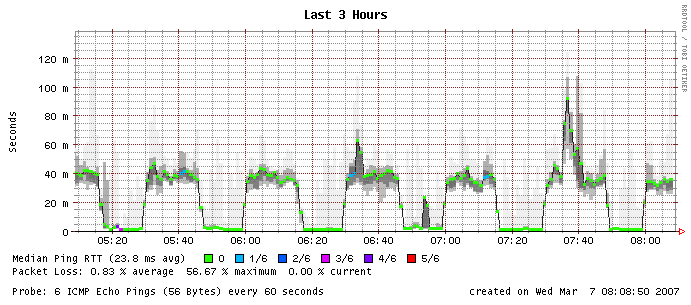
Here are some graphs monitoring the bridge. I setup a crontab to haul a 2 gig file over every 30 minutes.
 |
 |
 |
 |
 |
 |
 |
|